
Build a decision tree
On the canvas a workflow is a tree: each node is a step and each connection a way out of it. A decision sends people down a different branch depending on a condition.
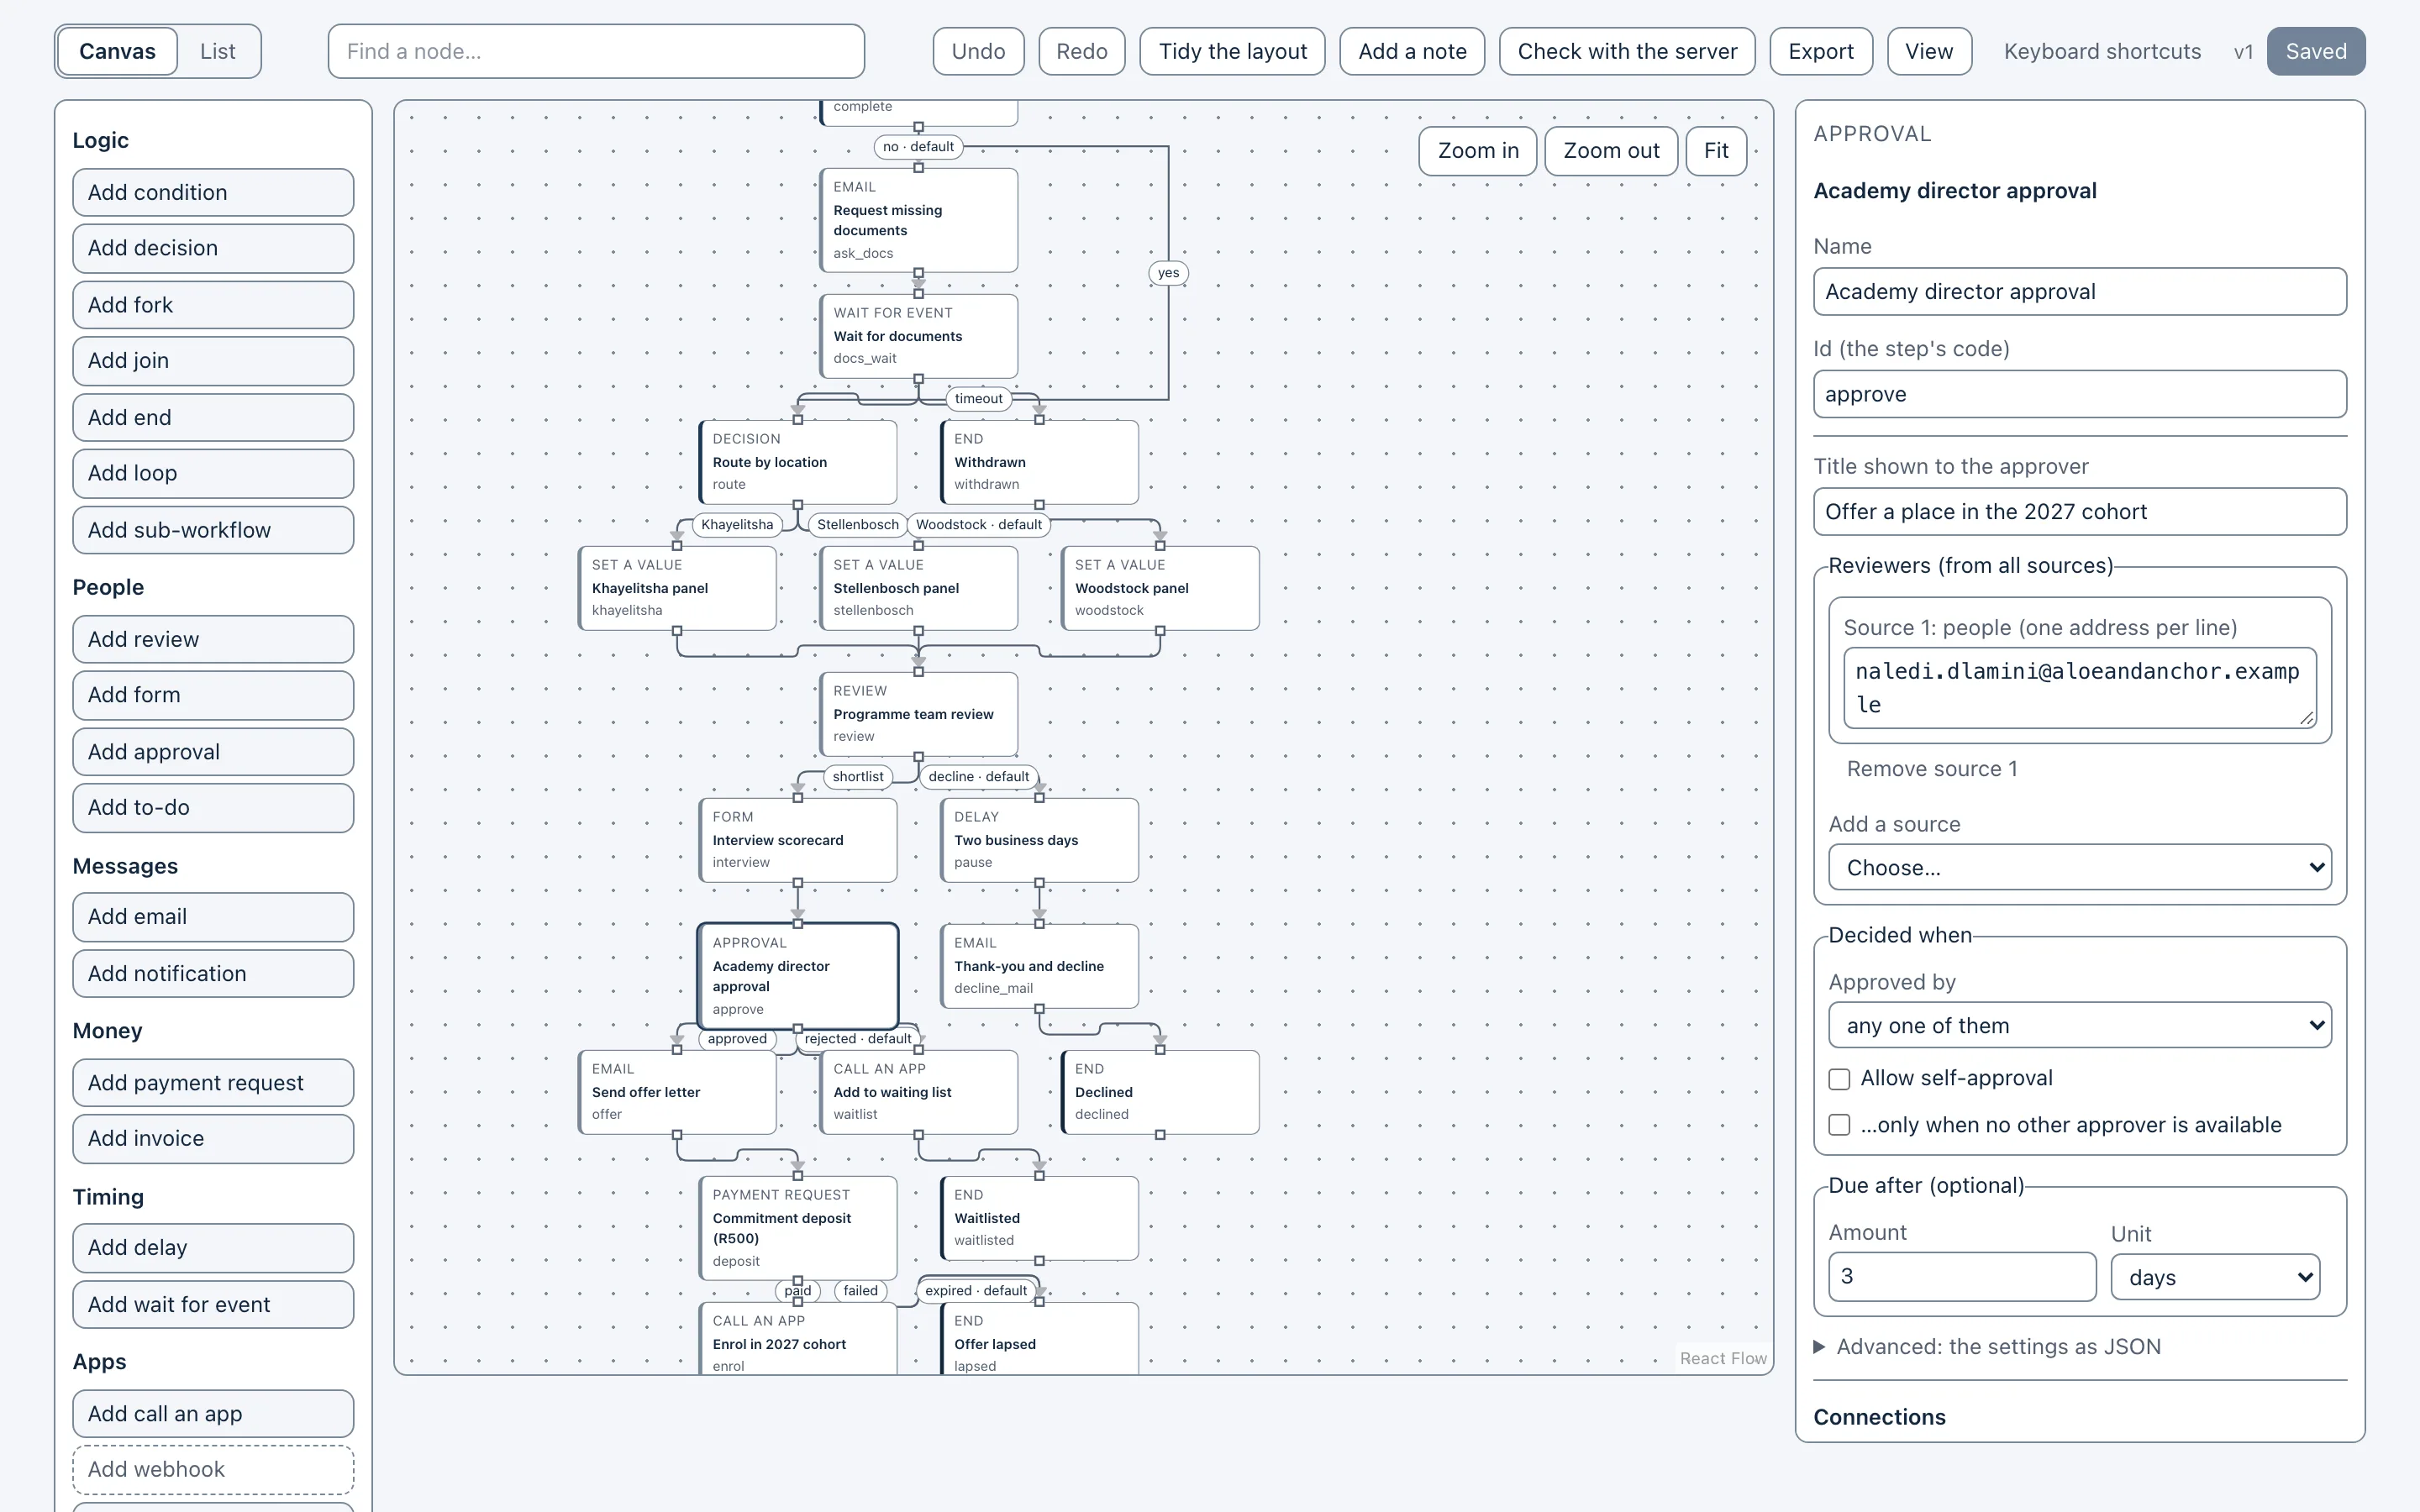
Start a workflow on the canvas
Create it
In Reach, open Workflows. In the On the shared engine section, enter a name under New workflow and choose Create. The canvas opens.
Draw the tree
Add a node
The palette on the left groups nodes under Logic, People, Messages, Money, Timing and Apps. Select a node on the canvas and choose, for example, Add decision: the new node goes under the selected one and is connected to it.
Decisions and conditions
A decision has several branches, each with a condition, plus a default; a condition is a yes/no branch.
Set each branch
In the settings on the right, under Connections, give each branch a Branch name and set Only when (optional): Add a rule with a Field, a Test and a Value, and choose whether to Match all of these or any of these. One branch is the Default (used when no other condition matches).
Connect
Join a node to another with Connect to… and Connect.
Prefer a list?
The List tab shows the same tree with ordinary controls; everything on the canvas can be done there.
Test it, then switch it on
Problems
Problems lists anything that would stop the workflow from running; each problem links to its node. Check with the server runs the engine’s own checks.
Simulate
In Simulate, fill in a Sample and choose Simulate. Show its path highlights the route that sample would take; Add another sample compares several.
Save and switch on
Choose Save — each save is a new version — then Switch on.
Good to know
Undo, Redo, Tidy the layout and Add a note are in the toolbar. For approval steps, see Approvals in workflows.