
Integrations
Overview
The Integrations screen connects Pages to services your organisation already uses, such as Planning Center for people and events. It also shows your online shop on your website, or hides it. Administrators set it up once and check it when a sync stops.
Before you start
To see the screen, your role needs Read on Settings & integrations. To save or test a connection, it needs Manage integrations. Roles that read everything do not have it. See Roles and access.
Have the details from the other service ready, such as the Application ID and Secret of a Planning Center personal access token.
Connect a service
Open Integrations
In the sidebar, select Settings › Integrations. Each service has a card with its kind, its name and its status.
Fill in the details
On the service’s card, type each field in full. A field marked (optional) can stay empty.
Save the details
Select Save. A message says the service is saved, and its status changes to Configured.
Test the connection
Select Test connection. Pages makes a real call with the details. The status changes to Verified or Failing.
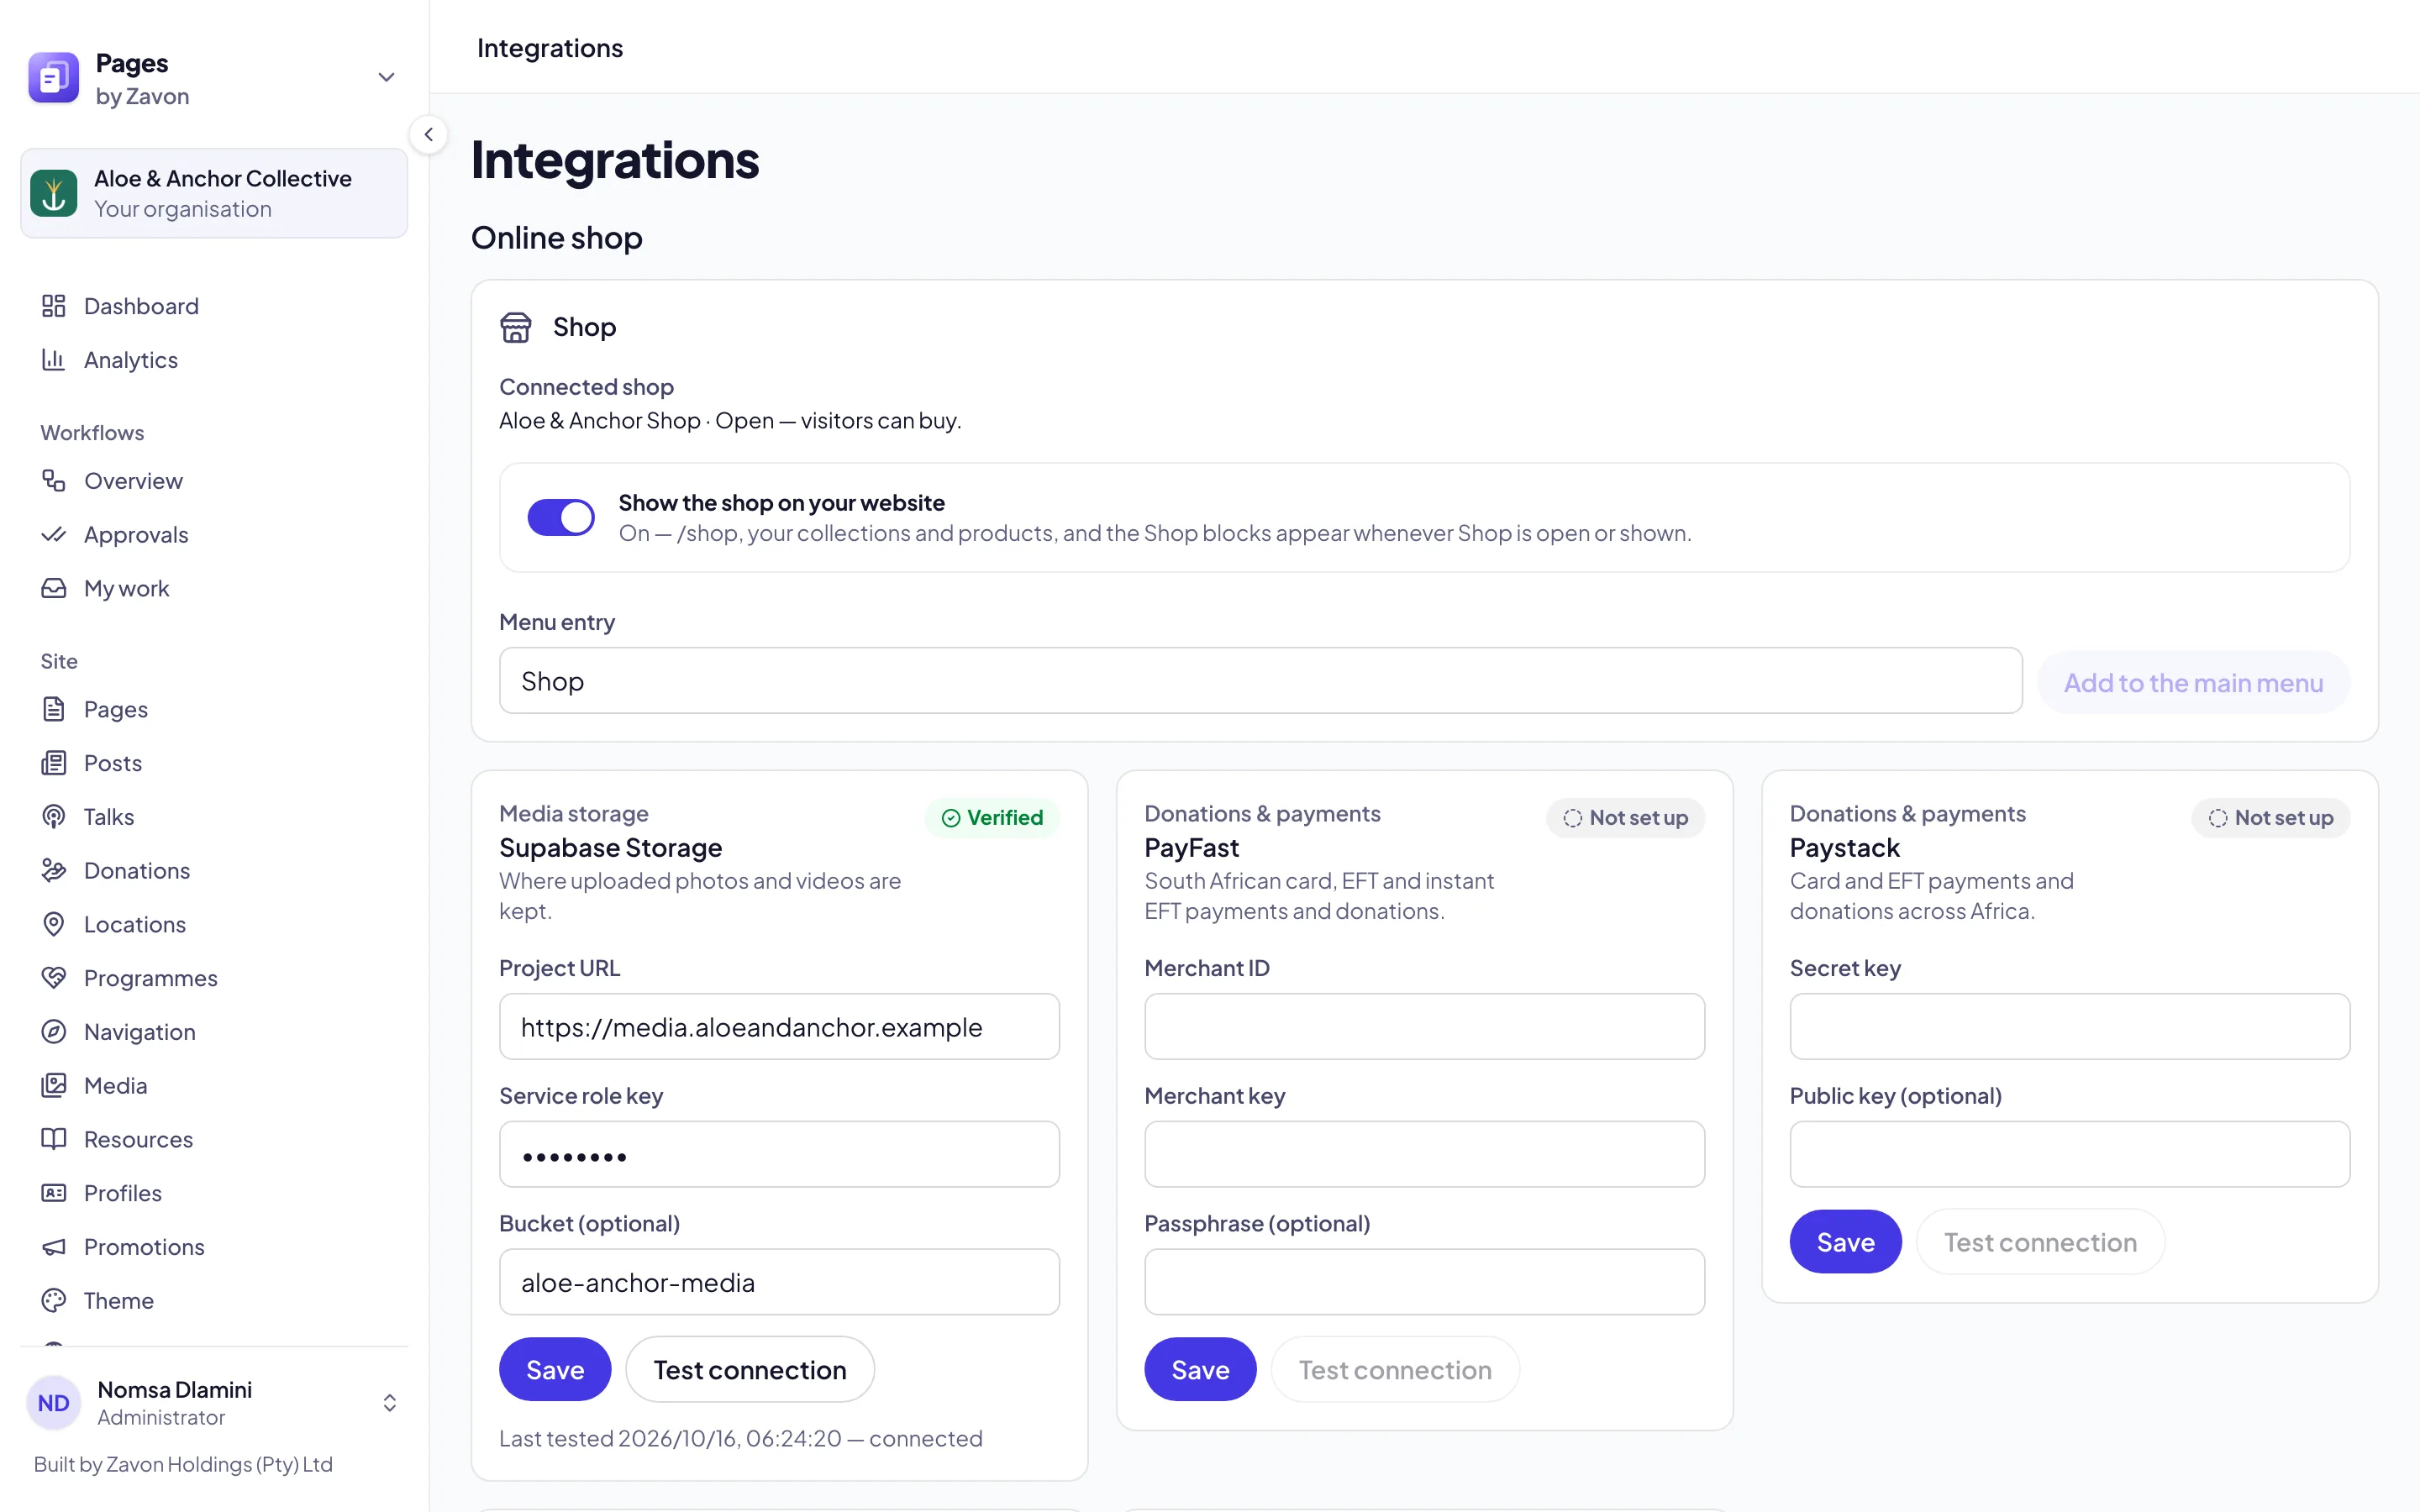
Show your shop on your website
Read the shop’s state
Under Online shop, read Connected shop. It says whether your shop is open, shown as Coming soon, or not open yet.
Turn the shop on
Turn on Show the shop on your website. Your website shows /shop, your collections and products, and the Shop blocks.
Add it to the menu
Type the words for the Menu entry, such as Shop. Select Add to the main menu. The entry shows in your main menu.
Troubleshooting
If Test connection is grey, fill in the required fields and select Save first. A payment service has no connection test on this screen.
If the status is Failing, the service refused the details. The line under the buttons says why. Type every field again in full, select Save, then test again.
If a field shows a masked value, a detail is saved there. A saved detail is never shown again. To change it, type the new value in full.
If the shop’s switch and menu entry are grey, your plan does not include the online shop. Point to them to see which plan has it.
If Add to the main menu is grey, the shop is off, or your main menu already has an entry for the shop.
Good to know
Statuses. Not set up means the required fields are empty. Configured means the details are saved but not tested. Verified means the last test connected. Failing means it did not.
Last tested. A tested card says when it was last tested, and the result.
Payments. To take payments for tickets and donations, set up the account under Settings › Payment settings. See Payment settings and the ledger.
The shop’s menu entry. To move or rename the entry later, use Site › Navigation.
Payment settings and the ledger: how your organisation is paid.
Connect Planning Center groups and lists: use Planning Center groups in Reach.
Shop: getting started: set up the shop that this screen shows on your website.
Roles and access: who may change integrations.