
Filter lists
Overview
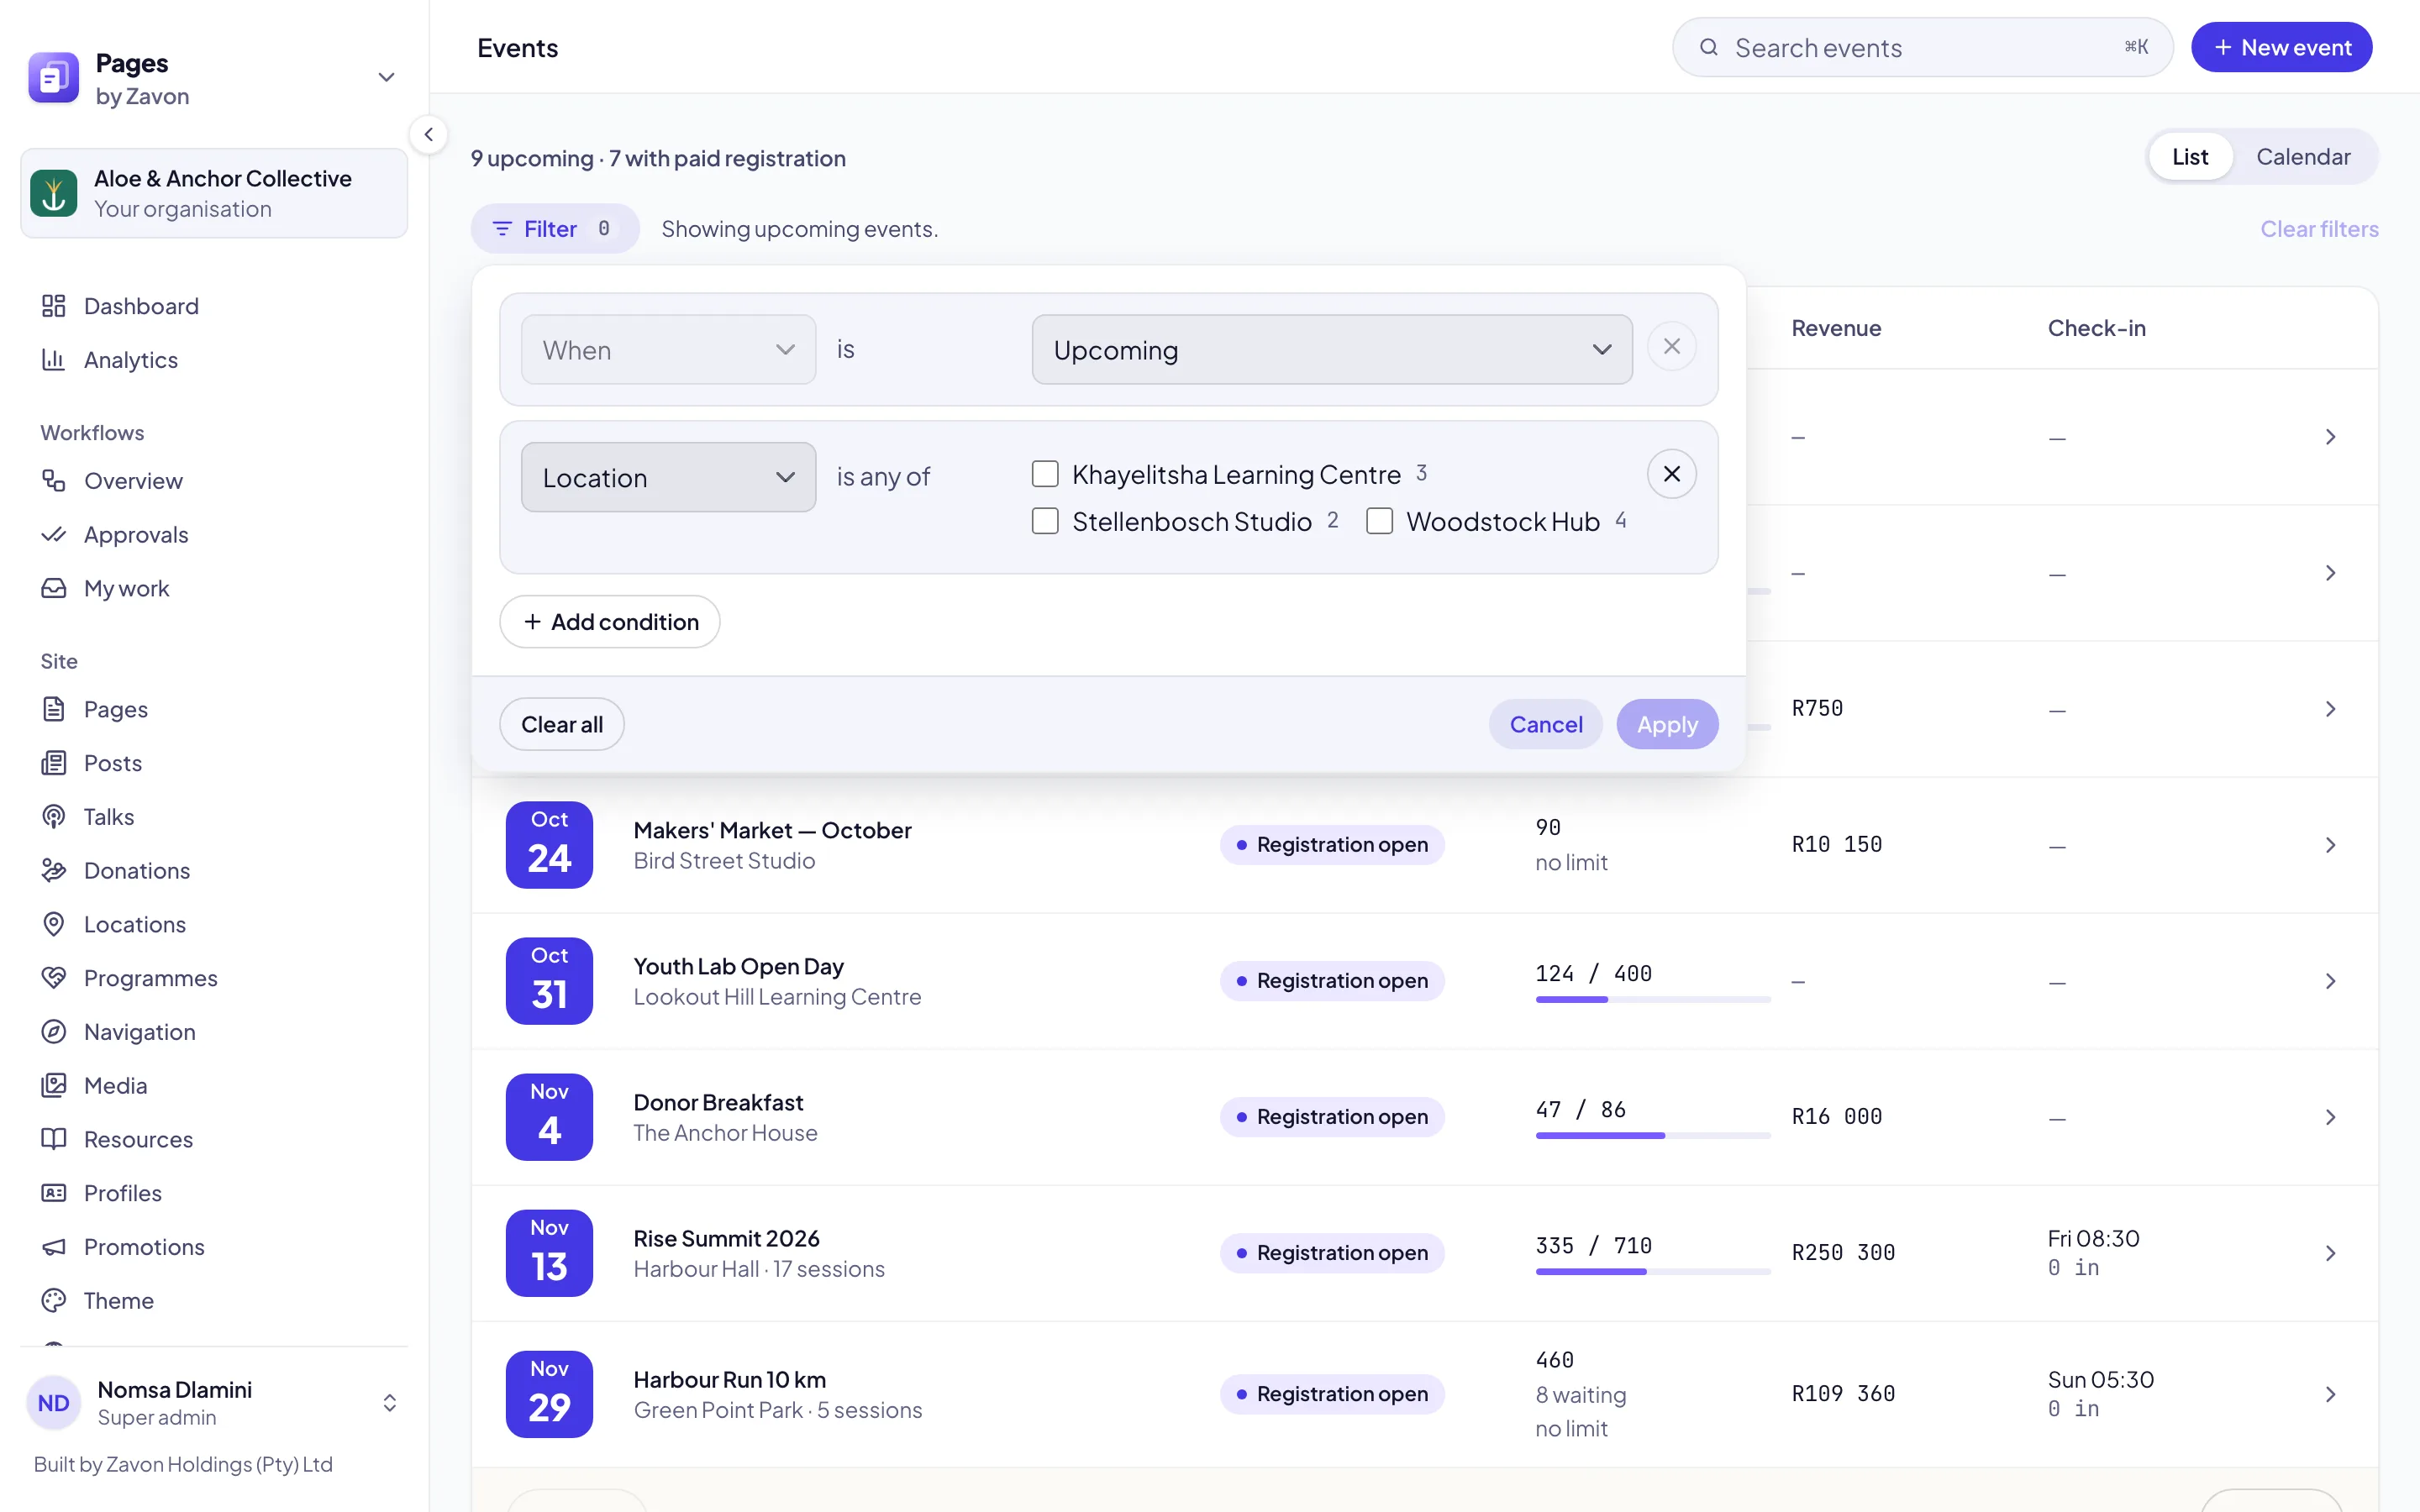
Lists in the Pages console, such as Events, Media and Applications, have one Filter button. A sentence beside it says what the list shows, such as “Showing upcoming events.”
Before you start
You can filter any list that your role can open. A filter changes what you see, not the data. See Roles and access.
Filter a list
Open the filters
Open a list, such as Events. Select Filter. The filter tray opens under the button.
Add a condition
Select Add condition. Set the field, such as Location, and then the value.
Set the operator
If the field offers more than one operator, set it, such as is or contains.
Apply the filters
Select Apply. The sentence beside Filter says what the list shows, and the button shows the count.
Clear the filters
To show the whole list again, select Clear filters.
Troubleshooting
If Apply is grey, a condition has no value. Set a value, or remove that condition.
If Add condition is grey, every field already has a condition.
If you cannot remove a condition, its field is always set, such as When on Events. Change its value instead.
If Clear filters is grey, no filters are applied.
Good to know
The list stays in reach. The tray does not cover the screen. Select anywhere outside it to close it, or use the Escape key. Cancel closes it without changes.
Archived and snoozed. Where a list hides archived or snoozed items, add the condition Archived or Snoozed to show them.
Share a filtered list. On Events, Approvals and Cohorts, the address keeps the filter. Copy the address to share the filtered list.
Media library: filter photos by location and availability.
Snooze: hide an item until a date.
Dashboard: the screen that links to your lists.