
Payment settings and the ledger
Overview
Payment settings decide how your organisation is paid for tickets and donations. The organisation has one account, and each location can have its own. The ledger lists every payment, offline payment and refund, with the account that took it.
Before you start
To see the screens, your role needs Payments: read. To set up or change an account, it needs Payments: edit. See Roles and access.
A role limited to one location sees only that location’s account and its payments.
Have the details of your gateway account ready. To be paid through Zavon instead, have your bank account details ready.
Set up the organisation account
Open Payment settings
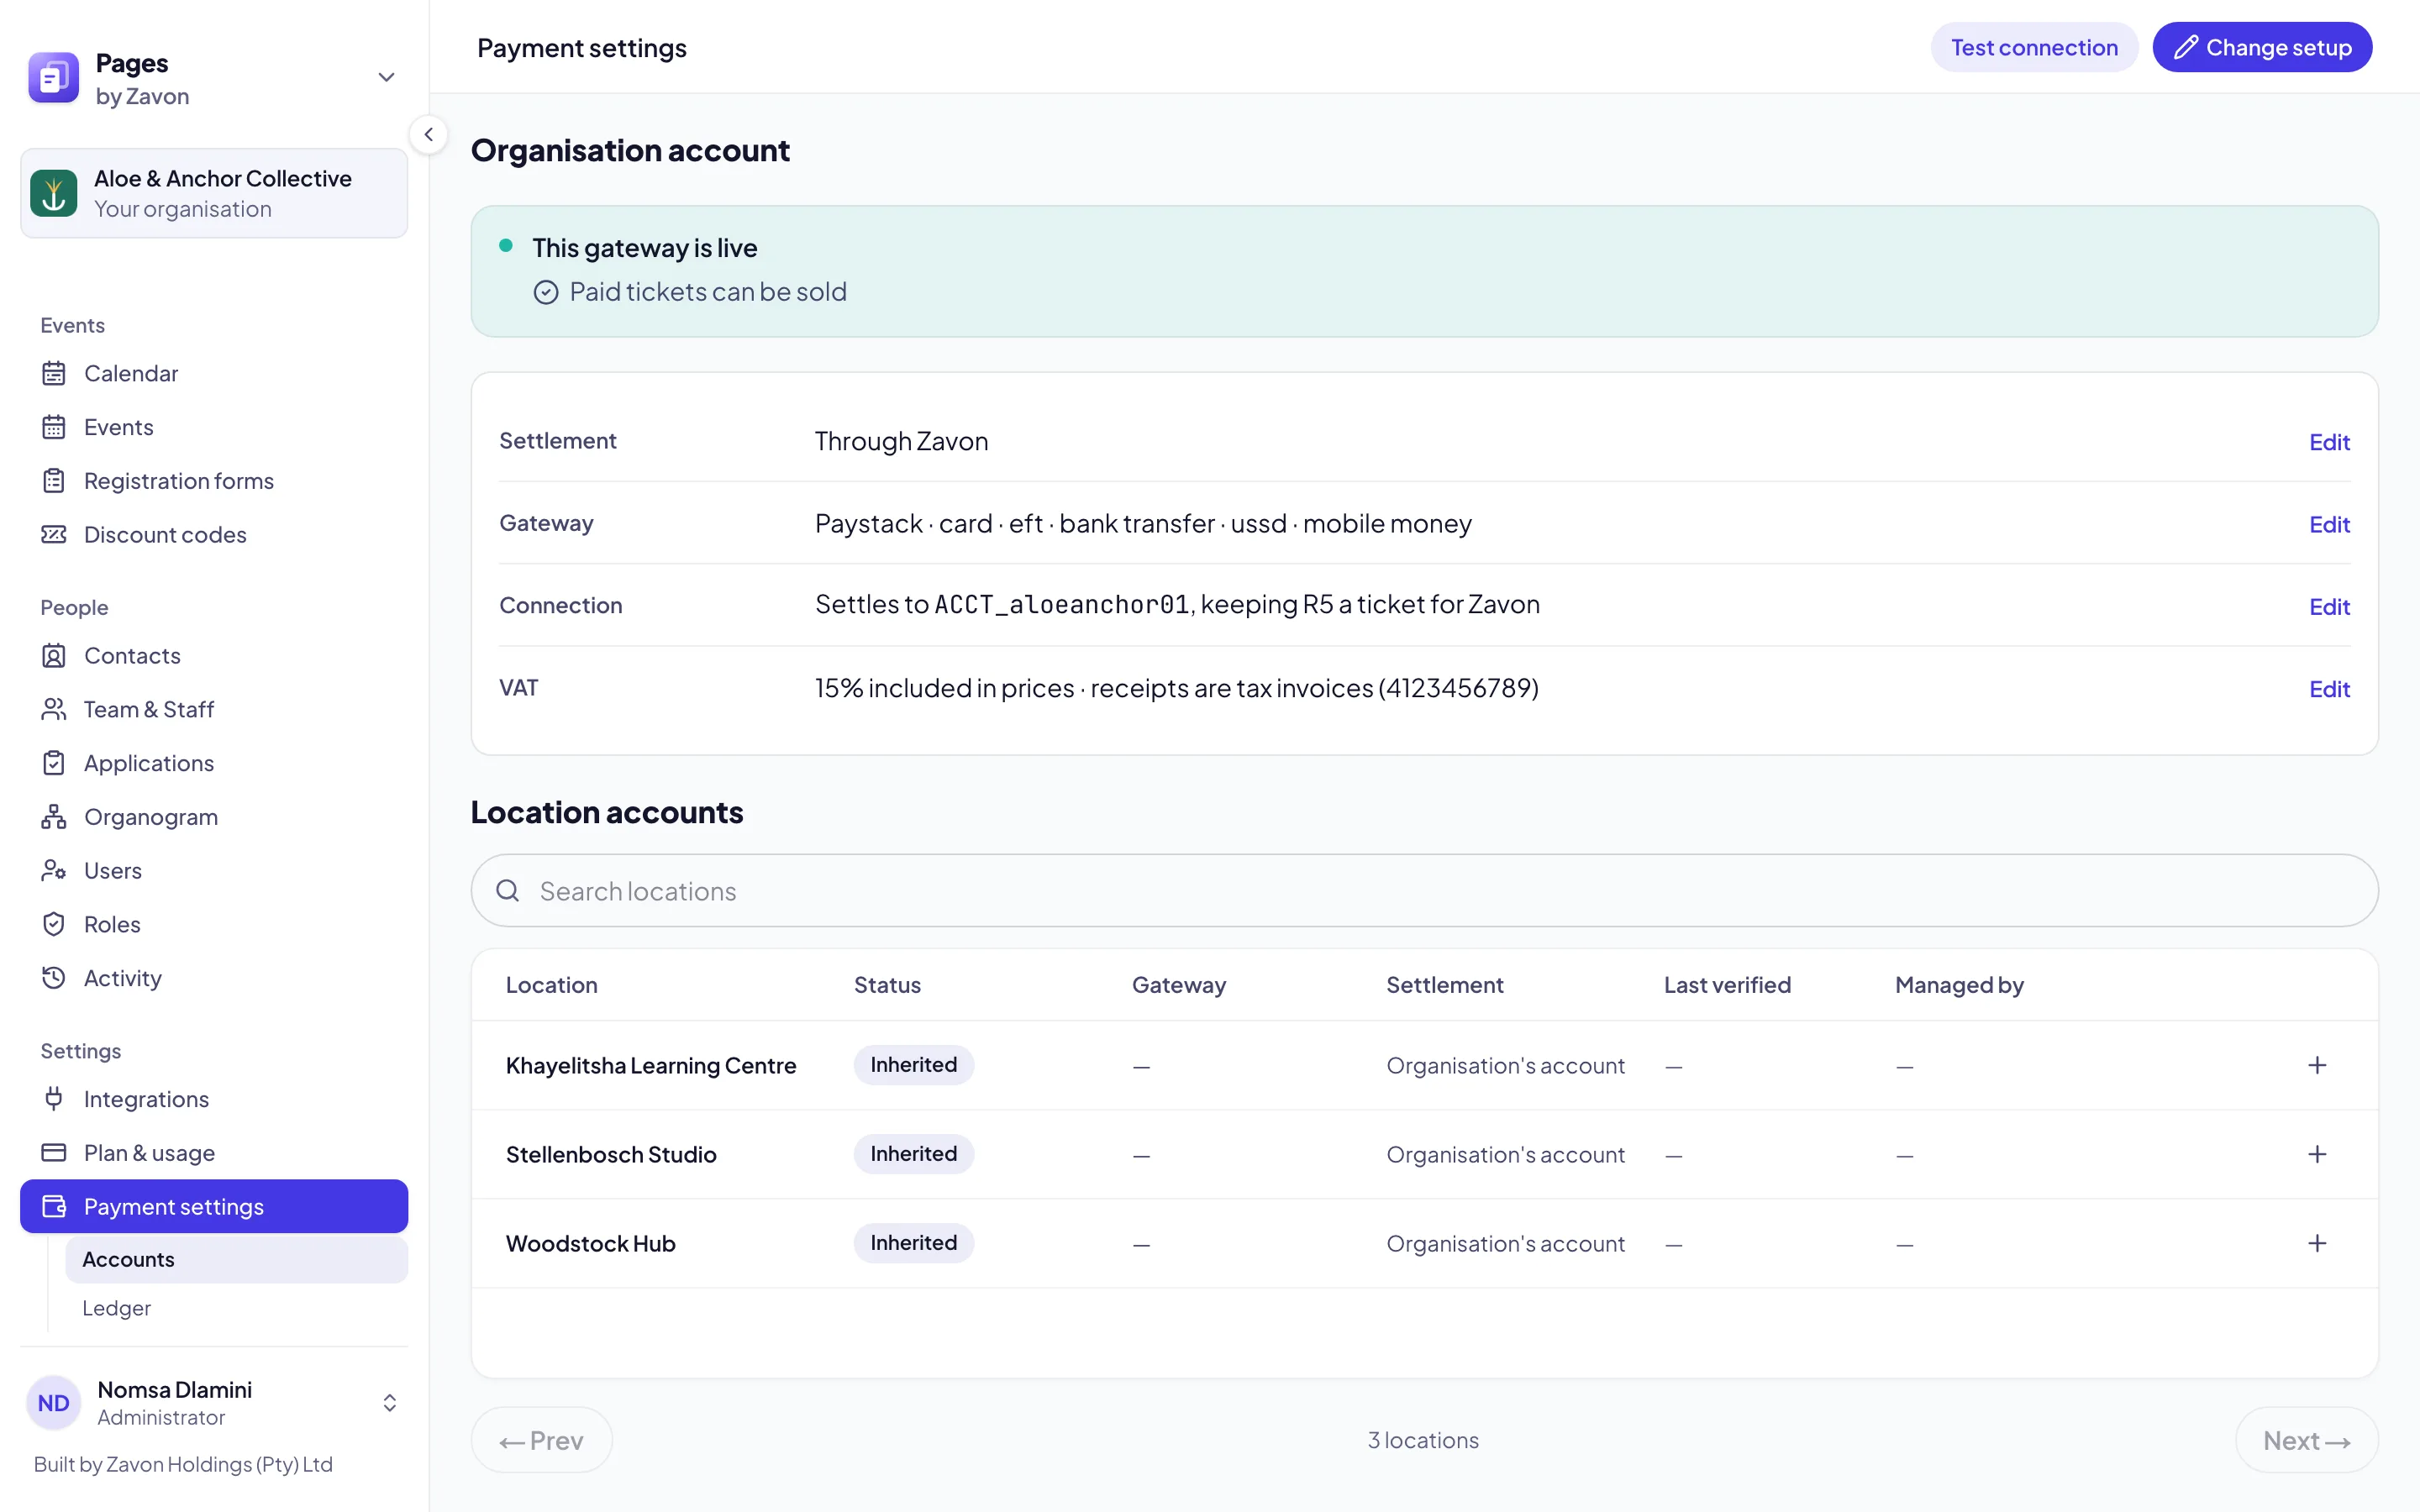
In the sidebar, select Settings › Payment settings. Organisation account says whether paid tickets can be sold.
Start the setup
Select Set up payments in the top bar. The setup opens at the Settlement step.
Select the settlement
Select Into our own account to use your own gateway account. Select Through Zavon to be paid without one. Select Next →.
Select the gateway
On the Gateway step, select the gateway your organisation uses. Select Next →.
Connect your account
On the Connection step, type each field from your gateway account. Select Save and test.
Add the bank account
If you selected Through Zavon, type your bank details on the Bank account step. Set the Bank. Select Open the settlement account.
Copy the callback address
If the step shows a callback address, select Copy. Paste the address into your gateway’s own dashboard.
Set VAT
On the VAT step, set Registered for VAT. If you are registered, type the VAT rate (%) and the VAT number. Select Save VAT.
Finish
Read the Summary. Select Done. The screen shows This gateway is live when paid tickets can be sold.
Change a setting
Edit one setting
On Payment settings, select Edit beside Settlement, Gateway, Connection or VAT. The setup opens at that step.
Test the connection
Select Test connection in the top bar. A message says whether the gateway accepted the details.
Give a location its own account
Find the location
Under Location accounts, find the location. Type its name in the search box to find it.
Start the setup
Select Set up (the + button) on its row. The setup opens at the Settlement step.
Follow the steps
Select the settlement and the gateway. Then type the details on the Credentials or Bank account step.
Add the payment contact
On the Payment contact step, type the Payment contact email. This address receives notices about the account.
Confirm
Select Confirm and set up. The row shows the account’s status, such as Live or Not verified.
View a location’s account
Open the account
Select View (the eye button) on the location’s row. The account’s summary opens.
See the details
Select View details. The details show masked, and they cannot be copied.
Check the account
Select Verify in the top bar. The Status and Last verified show the result.
Remove the account
To pay the location into the organisation’s account again, select Remove account. Select Remove account again to confirm.
Read the ledger
Open the ledger
In the sidebar, select Settings › Payment settings › Ledger. The totals show at the top.
Search
Type a reference, a payer or an event in the search box.
Narrow the list
Use the lists beside the search box to show one location, account, kind of entry or settlement.
Set the dates
Set From and To to show the payments between two dates.
Export
Select Export CSV in the top bar. A file of the payments that match downloads.
Troubleshooting
If the screen says Paid tickets cannot be sold yet, read the sentence under it. It names the step that is left.
If Test connection is grey in the setup, no details are saved yet. Type them and select Save and test.
If Payment issues shows on Payment settings, a payment did not match its order. Look up each listed reference in your gateway’s dashboard.
If a location shows Verification failed, point to the status to read why. Correct the details, then select Verify.
If a location shows Inherited, it has no account of its own. Its payments go to the organisation’s account.
If Set up and Edit are not on a location’s row, your role cannot manage that location’s payments.
If Export CSV is grey, no payments match the filters.
Good to know
A new gateway starts again. A new gateway or new details take the account off until the connection test passes again.
Test mode. An account on a test key shows test key beside its status. No real payments are made in test mode.
Viewing details is recorded. Each view of a location’s account details is a line in Activity. When an organisation-wide user views them, the location’s payment contact and the administrators get an email.
Totals. Received, Refunded, Net, Gateway fees and Platform fees cover every payment that matches the filters, not only the page.
Settlement. With gateway means the gateway holds the money until it pays out. Received offline is a payment recorded by hand, such as an EFT.
Refunds. A refund is its own line in the ledger, with a negative amount.
Tax invoices. With a VAT number, receipts are tax invoices. Without one, they stay receipts.
Locations: the places that can have their own account.
Add an event and sell tickets: paid tickets use these accounts.
Online donations: donations go to the same accounts.
Activity: who viewed or changed payment details.
Roles and access: who may manage payments.