
Add an event and sell tickets
Create an event, decide how people register, and set up tickets with prices, limits and a price breakdown.
Create the event
Start an event
In the sidebar, under Events, choose Events, then New event.
Details
Enter the Event name, choose an Event type, and set Start and End. Leave Recurrence on One-off for a single date; for a series, see Recurring events.
Location
Choose the Host location and the Attendance: In person, Online or Hybrid. Pick a Saved venue or add a New venue.
Content
Add a Summary, a Description, What to bring and a Cover image.
Registration
Choose No registration, Register on this site or External registration. To take registrations here, choose Register on this site and set Registration opens, Registration closes and the Capacity.
Publish
Choose Confirm and publish, or Confirm as draft to publish it later.
Set up tickets
Add a ticket
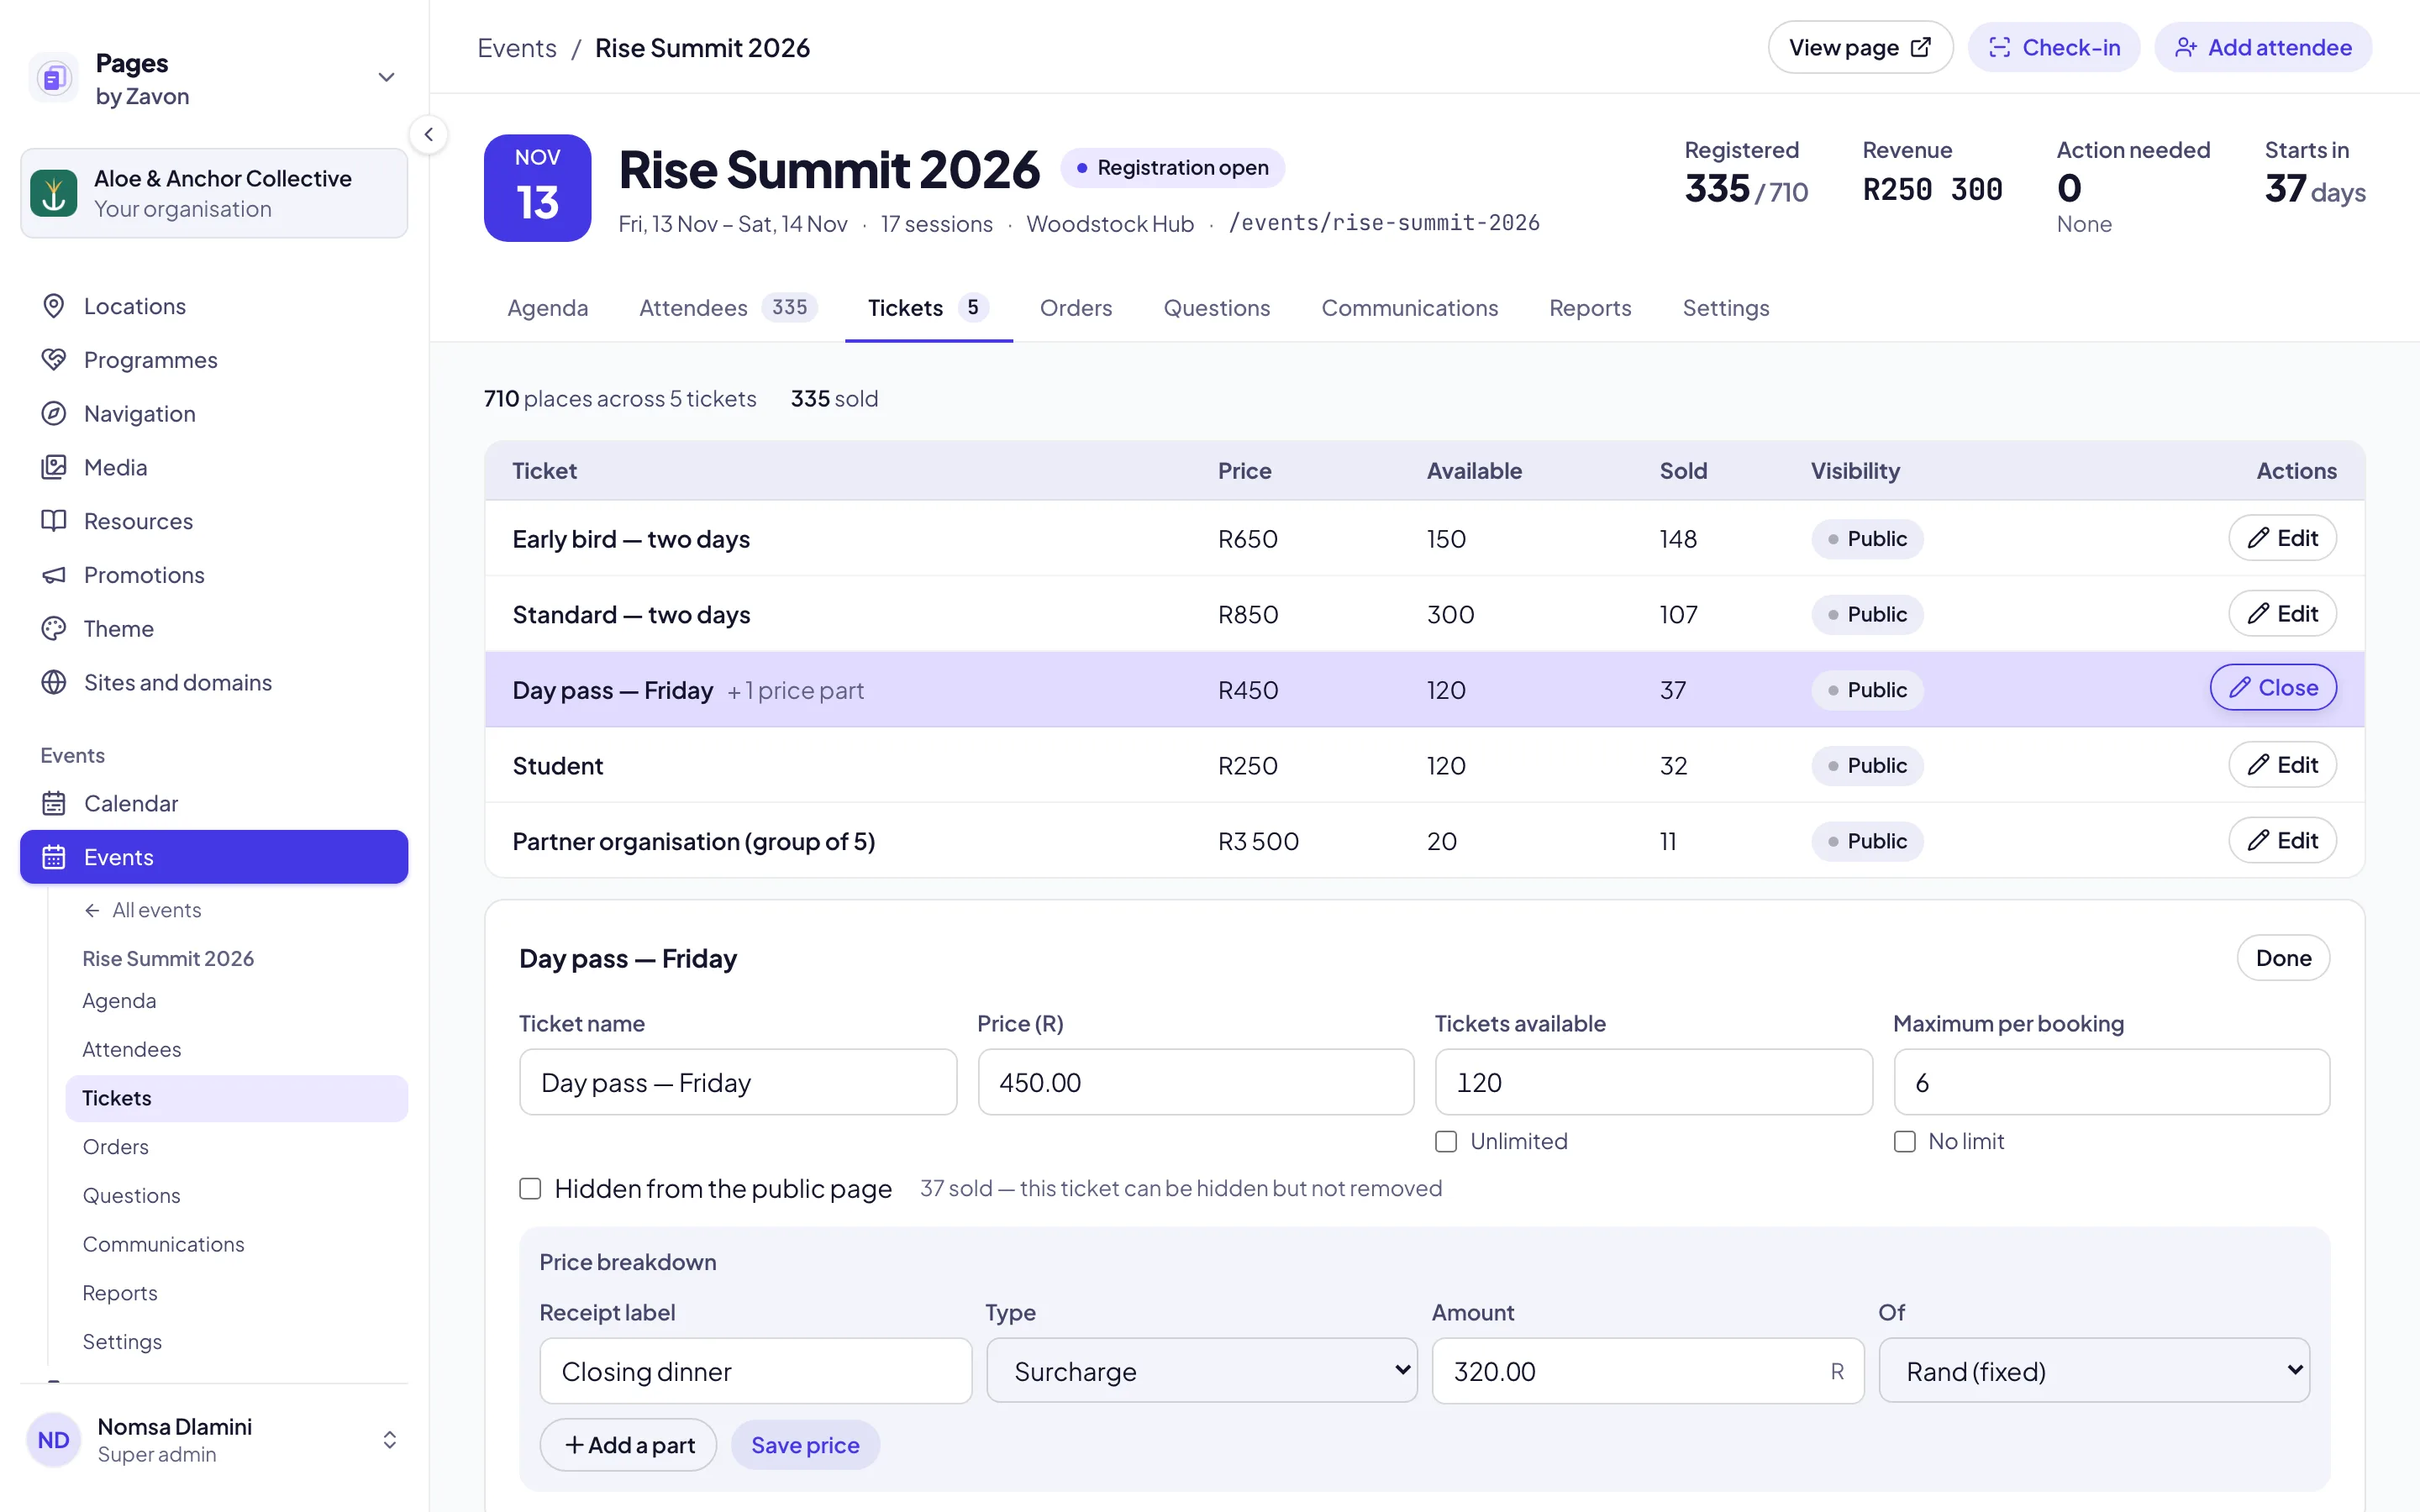
Open the event and go to its Tickets tab. Choose Add a ticket.
Name and price
Enter the Ticket name, the Price (R) and how many Tickets available. Set a Maximum per booking if you need one, or tick Hidden from the public page for a ticket you share privately.
Show how the price is made up
Open Price breakdown and choose Add a part. Give it a Receipt label, a Type (Discount or Surcharge) and an amount in Rand (fixed) or % of subtotal.
Save
Choose Save tickets.
Good to know
Registration questions are written once under Events → Registration forms and chosen per event on the event’s Questions tab.
Discount codes live under Events → Discount codes.
Once people register, the event’s Attendees, Orders and Reports tabs show who is coming and what was paid. What each attendee receives, and checking them in at the door, are in Tickets and calendars; passing a ticket on is in Ticket transfers.
Paid tickets go into the payment account set up under Settings → Payment settings; each location can have its own (see Locations).